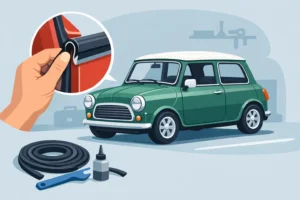
A sagging, stained or torn roof lining can make an otherwise tidy Classic Mini feel unfinished. Knowing how to install mini headlining properly makes a major difference to the cabin, but it is a job where rushing the adhesive or trimming too early can spoil an expensive new lining. Take your time, work from the centre outwards, and let the window rubbers hide the final edges.
This is a practical job for a careful home restorer, particularly if the glass is already out for a rebuild. It can be done with the windows in place, but fitting a new headlining around existing seals is more awkward and rarely gives the same clean result.
Check the headlining suits your Mini
Before stripping anything out, make sure the replacement headlining is correct for your bodyshell and roof arrangement. Classic Minis have changed over the years, and details such as the number and position of roof bows, interior light aperture, sun visor fixings and rear quarter areas can vary. A standard fixed-roof saloon is the most straightforward; a Webasto or other aftermarket sunroof needs a lining made specifically for that opening.
Lay the new headlining out in a warm, clean room for several hours before fitting it. Vinyl and cloth-backed material become more pliable when warm, which helps it settle into the roof shape. Avoid leaving it folded until the moment you need it, as hard creases can take time to disappear.
If you are restoring the car shell-up, fit the headlining after paintwork and roof insulation are complete but before the front and rear screens, door seals and much of the interior trim go back in. This order saves a lot of awkward tucking and reduces the chance of damaging fresh trim.
Remove the old lining and prepare the roof
Take photographs before removing the old headlining. They are especially useful for recording the route and order of the roof bows, plus the way material was folded around the windscreen and rear screen apertures. Keep every bow, clip and fixing together, and label the bows as they come out. They can look similar, but their lengths and bends are not always interchangeable.
Remove the sun visors, mirror, interior light, roof-mounted trim and any grab handles fitted to the car. The windscreen and rear screen should ideally be removed, along with the relevant rubber seals. If the old lining is badly deteriorated, remove it gently rather than tearing it away, as the remains often show where the factory folds and cuts were made.
Once the roof is bare, clean away all old foam, adhesive and loose rust. A wire brush, scraper and suitable panel wipe will help, but do not soak the roof skin with solvent. Surface corrosion around the screen apertures or roof rails must be dealt with before the new lining goes in. A headlining hides the problem temporarily, not permanently.
This is also the right time to inspect the roof insulation. Thin sound-deadening or insulating material can make the cabin feel less tinny and help with heat, but avoid thick products that force the headlining downwards or prevent the bows seating correctly. Anything fitted above the lining must be secure. Loose insulation will eventually create a visible sag.
For a straightforward installation, have these items ready:
- The correct headlining, roof bows and bow sleeves if required
- High-temperature contact adhesive suitable for automotive trim
- A clean cloth, small brush, masking tape and sharp trimming blade
- A plastic trim tool for tucking material into apertures
- New screen rubbers, clips or finishing trims where the old items are tired
Do not use general household glue. The roof panel gets hot in summer, and unsuitable adhesive can soften, bleed through the material or let the edges fall away.
How to install Mini headlining step by step
Start with a dry fit. Feed the roof bows through the stitched sleeves in the new headlining, matching their order to the photographs or the old lining. Do not assume the sleeves are all identical. Once the bows are in place, offer the assembly up to the roof and locate each bow in its mounting holes or clips.
At this stage, the headlining should hang evenly with its centre seam, if fitted, running straight along the centre of the roof. Check this from outside the car as well as from inside. A lining that starts a few millimetres off-centre at the front can look noticeably crooked by the time it reaches the rear screen.
With the bows located, begin at the centre of the front windscreen aperture. Pull the material forward just enough to remove slack, then mark its position with a small piece of masking tape. Repeat at the centre of the rear aperture. The aim is controlled, even tension – not stretching the lining as hard as possible. Over-tensioning can pull the bows out of shape, distort the grain of the material and leave thin, stressed areas around the corners.
Apply a narrow, even coat of high-temperature contact adhesive to the metal lip and the reverse of the headlining where it will bond. Follow the adhesive instructions carefully. Contact adhesive normally needs to become touch-dry before the two surfaces meet. If joined while wet, it may soak into the material and will be difficult to reposition.
Bond the front centre first, then the rear centre. Work outwards a short distance at a time, alternating from left to right to keep the tension balanced. Smooth the material with a clean hand or cloth rather than dragging a hard tool across its face. When the front and rear are secure, move to the sides and work from the centre of each roof rail towards the corners.
The corners are where patience pays off. Make small relief cuts only in the surplus material outside the bonding area, allowing it to fold neatly around curves. Do not make deep cuts towards the visible edge. It is easy to remove more material later; it is impossible to add it back once trimmed.
A few light ripples may settle as the material relaxes, particularly after it has been folded in the box. Larger wrinkles usually mean the lining is unevenly tensioned or has been bonded too far from its intended position. If the adhesive is still fresh, carefully lift and reposition the affected section. Once it has fully cured, pulling on it generally makes the problem worse.
Trim apertures only after the lining is secure
Leave enough material around the windscreen and rear screen openings for the rubber seals to capture it. Trim gradually, keeping a generous overlap until you are certain where the seal will sit. The screen rubber and finishing trim are designed to cover the raw edge, so there is no benefit in cutting the headlining flush with the aperture.
For the interior light, sun visors, mirror and other fixings, locate the original holes from behind where possible. Make a small cross-shaped cut rather than cutting a large circle. The screw or fitting can then open the material only as much as needed, giving a tidier finish and reducing the risk of the cut spreading.
Refit the glass and seals with care. This is often the point where a good headlining can be spoiled, as a careless tool can snag or drag the material at the aperture. If the screen rubbers are cracked, stiff or distorted, fitting new ones is worthwhile while access is easy. The same applies to tired door seals and roof trim clips.
Common problems and how to avoid them
The most common mistake is fitting the lining cold. Cold material is harder to tension evenly and more likely to retain fold marks. Give it time in a warm environment, but do not use excessive heat from a heat gun. Too much heat can shrink, blister or discolour vinyl. A gently warmed garage is far safer.
Another issue is adhesive contamination on the visible face. Protect the headlining with clean hands, use masking tape where practical, and keep solvents away from the finished surface. If a small mark appears, test any cleaner on an offcut first. Strong solvent can leave a bigger mark than the adhesive.
Finally, do not treat every Mini roof as standard. Cars that have had roof repairs, non-original trim, aftermarket sunroofs, roll cages or previous restoration work may need a different approach. Check the fit before applying glue, and resolve any bow or aperture issue while the material can still be removed easily.
A freshly fitted headlining is one of those details that changes how a Classic Mini feels every time you open the door. Work methodically, use quality trim materials, and give the adhesive time to do its job. If you are ordering parts for the wider interior rebuild, Bull Motif Mini Spares can help you source the Mini-specific seals, clips and trim items that make the finished installation look right.