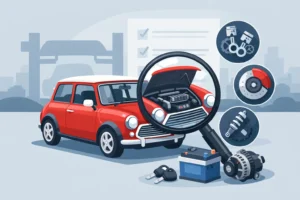
A Mini can look sound from ten feet away and still be hiding corrosion in the A-panels, scuttle corners, front wings and floor edges. Once the paint is stripped back, the quality of the replacement metal matters just as much as the welding. British Motor Heritage panels are a familiar choice for owners who want their Classic Mini restoration to retain the correct lines, mounting points and character of the original car.
For a car that was built in huge numbers over several decades, Minis can be surprisingly particular. There are differences between early and later shells, saloon and Clubman panels, external-hinge and internal-hinge doors, as well as changes around lights, seams and fixings. Choosing the right panel at the start saves time at the bench and helps avoid the expensive job of cutting out a newly fitted part because it was not right for the vehicle.
What British Motor Heritage means for a Mini restoration
British Motor Heritage, often shortened to BMH, is associated with authorised replacement body panels for classic British vehicles. For Mini owners, the attraction is not simply a name stamped on a panel. It is the prospect of metalwork made to closely follow original specification, using established pressings and correct details where available.
That matters because a body panel is rarely a standalone piece. A front wing has to meet the bonnet, door, scuttle and front panel cleanly. A floor pan must line up with crossmembers, seat mounts and sills. A poorly shaped pressing can be made to fit, but every adjustment adds labour, heat and risk of distortion. On a restoration where the shell has already needed substantial work, that extra time soon becomes costly.
BMH panels are particularly worth considering for structural or highly visible areas. The front panel, rear valance, wings, door skins, sills, heelboard and floor sections all influence how the finished Mini sits and looks. Correct swage lines and returns are not cosmetic details to dismiss. They determine whether the car retains that crisp, compact shape that makes an original Mini instantly recognisable.
That said, the right choice depends on the job. A genuine-specification panel may be the sensible route for a long-term restoration, a valuable original car or a shell receiving professional paintwork. For a budget-conscious road Mini, a quality pattern panel may have its place in a smaller, less visible repair. The key is to make that decision before metal is removed, not when the car is already on stands.
Where panel quality makes the biggest difference
Front-end repairs
The Mini front end is a collection of panels working together. Wings, front panel, inner wings, bonnet gutter, scuttle and A-panels all meet in a compact area. Corrosion often spreads between seams, so replacing one outer panel without inspecting the structure behind it can create a tidy-looking but short-lived repair.
A correctly formed front wing makes a noticeable difference around the headlamp aperture, bonnet gap and door edge. If you are replacing both wings and the front panel, trial-fit the whole assembly before committing to welds. Fit the bonnet, check the grille aperture and use the doors as reference points. It takes longer at the trial stage, but it is far easier than correcting panel gaps after paint.
Sills, floors and structural sections
Sills are not just visual repairs. On a Mini, they form part of the body structure and are often fitted as a layered arrangement, with inner, outer and closing panels depending on the model and extent of corrosion. Patching only the visible outer sill can leave weakened metal behind it and may cause trouble at MOT time.
The same applies to floors and heelboards. Inspect adjoining crossmembers, seat-belt mounting areas and jacking points before ordering. If rot has travelled into a flange or seam, a larger repair section may be the cleaner and safer answer. It can feel counterintuitive to cut out more metal, but welding a new panel to thin steel is a false economy.
Doors, skins and rear bodywork
Door skins demand patience. Even a well-made skin needs careful folding, preparation and alignment to avoid a rippled edge or a door that catches on the wing. Check the door frame for corrosion along its bottom edge before fitting a skin. If the frame is weak, a new skin will only disguise the problem.
At the rear, valances, boot floors and companion bins can hide corrosion behind underseal and trim. These areas affect rear-light alignment, bumper position and the way the boot lid closes. Before ordering panels, remove enough trim to see the full extent of the issue. A small rust bubble near a rear valance can be the visible end of a much larger repair.
Check the Mini before ordering metal
Classic Mini parts are model-specific for good reason. Take time to identify the year, body style and any previous modifications. A car may have been repaired several times across its life, and what is fitted now is not always what left the factory.
Measure and photograph the affected area before cutting. Record door gaps, bonnet gaps, hinge positions and trim holes. If possible, brace the shell before removing major sections, especially around the scuttle, A-panels, sills or floor. A Mini shell is light, but it is not immune to movement once structural metal has been removed.
Also check whether the repair needs related parts. Replacing a wing may reveal damaged beading, captive nuts, headlamp bowls, splash guards or mounting hardware. A sill replacement may require closing panels, jacking-point sections and seam sealer. Ordering these items together keeps a project moving and avoids a half-finished car occupying the garage while you wait for a small but essential fitting.
At Bull Motif Mini Spares, the aim is to make that process more straightforward by keeping Classic Mini parts organised around the systems owners actually work on, from bodywork and trim to mechanical servicing items.
Fit first, weld once
No replacement panel should be treated as a fit-and-forget item. Even high-quality pressings can need light fettling because the surrounding car may have moved, been repaired previously or suffered corrosion beyond the visible area. The standard to aim for is not whether the panel can be welded in, but whether it fits with sensible gaps and minimal force.
Start by removing paint, filler and underseal far enough beyond the damage to find sound steel. Cut only what needs to come out, but do not leave thin, pitted edges simply to keep the repair small. Clean mating faces back to bare metal, treat enclosed surfaces appropriately and apply weld-through primer where required.
Offer the new panel up repeatedly. Use clamps, self-tapping screws or panel fasteners during the trial fit, checking alignment with nearby panels as you go. On outer bodywork, refit the bonnet, doors, lamps or grille where relevant. These are the parts that reveal whether the panel is sitting correctly.
When welding, use short, controlled tacks and move around the panel to manage heat. Long runs on thin Mini steel can pull a panel out of shape quickly. Once the welding is complete, dress the joints carefully without grinding the surrounding metal too thin. Then protect both sides of the repair. Primer, seam sealer, paint, stone-chip protection and cavity wax all have a role, depending on the location.
Original appearance versus improved usability
Restoration is not always about returning a Mini to exact factory specification. Some owners are rebuilding a concours car; others want a dependable weekend Mini, a touring car or a track-focused project. British Motor Heritage body panels can provide a strong starting point in any of those cases, while the final specification remains your choice.
For example, it may make sense to retain original exterior seams and trim positions while improving corrosion protection behind the panel. A road car may benefit from better cavity wax treatment and careful use of modern seam sealers, even if those materials were not part of the original production process. Conversely, if authenticity is central to the project, avoid unnecessary holes, non-standard flanges and visible modifications that will be difficult to reverse later.
Think beyond the initial fit, too. A Mini that will see wet roads needs proper drainage paths, sealed seams and protected cavities. Freshly restored metal can begin corroding again from the inside if moisture is trapped behind a repair. The best panel in the world cannot compensate for poor preparation or neglected aftercare.
Build a repair that lasts
Bodywork is where a Classic Mini project often tests patience, budget and enthusiasm. Good panels reduce uncertainty, but the lasting result comes from accurate assessment, careful trial fitting and thorough corrosion protection. Do not rush to cover a repair because it looks straight in bare metal. Check the gaps, inspect the reverse side and make sure every joint is sealed before the car goes back into service.
A properly repaired Mini rewards that effort every time the door shuts cleanly, the bonnet sits square and the car turns up years later with solid metal still beneath the paint.