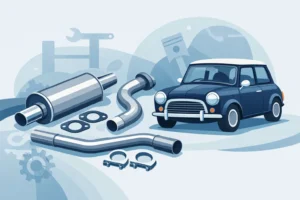
Petrol smells in the boot, a Mini that hesitates on hills, or an engine that cuts out after a few miles are rarely faults to ignore. On a Classic Mini, the fuel system is straightforward enough to work on at home, but its age, layout and previous repairs can make diagnosis less obvious than it first appears. This Classic Mini fuel system guide covers what each part does, where common problems start and how to plan a dependable repair rather than replacing parts at random.
Know Which Classic Mini Fuel System You Have
Most carburetted Minis use a rear-mounted fuel tank, a pick-up pipe, a low-pressure mechanical or electric pump, rigid fuel pipe running beneath the car, a short flexible hose at either end, and one or more SU carburettors. The basic principle is simple: fuel leaves the tank, reaches the carburettor at low pressure and is metred into the engine.
The details matter. A standard single-carburettor Mini and a twin-carb Cooper S-style setup may use different fuel lines, pump arrangements and throttle linkages. Early cars may have a different tank sender or filler neck arrangement from later models. Minis fitted with twin fuel tanks need sound changeover plumbing or balance-pipe arrangements, depending on the specification.
Later 1275cc SPi and MPi cars are a separate case. Their injection systems work at much higher pressure and use an electric pump, injection-specific pipework, filters and electronic controls. Never fit ordinary low-pressure carburettor hose or a carburettor-type pump to an injection Mini. Before ordering anything, establish the car’s year, engine type and whether it remains close to its original specification.
Start at the Tank and Filler Neck
The fuel tank is tucked into the rear boot area, where condensation, ageing seals and previous body repairs often create trouble. Check the tank seams, mounting points and lower corners for corrosion. A tank can look presentable from above while rusting underneath, especially if damp carpet, a leaking rear window seal or a poor boot-floor repair has trapped moisture around it.
Inspect the filler neck and its rubber seal as well. A cracked seal can allow water and dirt into the tank, while a loose or hardened connection can produce a persistent petrol smell. The cap must seal correctly but still allow the system to breathe as designed. If the tank cannot vent, a vacuum can develop as fuel is used, starving the engine after a period of driving.
Fuel gauges deserve a quick check while you are there. A wildly inaccurate gauge is not always an electrical fault. The sender unit, its earth connection and the float mechanism all affect the reading. If a sender is being replaced, match it to the correct tank and gauge type rather than relying on appearance alone.
When fitting a new tank, use fresh mounting pads, correct straps or fixings, and a new sender gasket where required. Reusing flattened seals and corroded fittings is false economy when access is easy.
Twin fuel tanks need extra attention
Twin tanks look right on certain period builds and offer useful capacity, but they add joints, hoses and potential leak points. Both tanks must be securely mounted, the filler arrangements must be correctly sealed, and any crossover or changeover system must be installed exactly as intended.
Do not assume that fuel will transfer evenly between tanks. It depends on the plumbing layout and whether the system uses a balance pipe or a manual valve arrangement. If one tank appears not to feed, investigate the hoses, taps and pick-up points before blaming the pump.
Fuel Lines, Hoses and Filters
The metal fuel pipe beneath a Classic Mini is durable, but it is exposed to road spray, debris and corrosion. Follow it from the rear of the car to the engine bay, checking for crushed sections, rusty clips and signs of dampness around unions. Any wetness or petrol smell around a line deserves immediate attention.
Flexible hose is often where older systems fail. Modern unleaded petrol and ethanol blends are harder on unsuitable old rubber than the fuel available when many Minis were built. Use quality fuel hose intended for modern petrol, with the correct internal diameter for the application. Hose that is too loose invites leaks; hose that is too tight can damage fittings and make removal difficult later.
Keep flexible sections short and routed away from sharp edges, hot exhaust components and moving linkages. Secure them with suitable fuel-line clips, not improvised hardware that can cut into the hose. A transparent inline filter can be useful for spotting contamination, but it should be fitted in a safe, cool position and replaced as part of routine maintenance. Do not place a heavy filter where it pulls on a carburettor inlet or creates a vulnerable joint above a hot manifold.
If debris is found in the filter, do not merely fit another one and carry on. Sediment can point to tank corrosion, degraded hose or dirt introduced during a previous repair. Clean the system properly, otherwise the new filter will only postpone the next blockage.
Mechanical and Electric Fuel Pumps
Many carburetted Classic Minis use a mechanical pump driven by the engine. These are simple and effective, but a worn diaphragm, leaking gasket or tired valves can reduce delivery. Fuel visible around the pump, a strong smell in the engine bay, or oil that smells of petrol should be treated as a warning sign. A diaphragm failure can allow fuel into the engine oil, reducing lubrication and risking serious wear.
Electric pumps are common on modified cars and some original specifications. They must be matched to a carburettor’s low-pressure requirements. More pressure is not better with an SU carburettor: excessive pressure can overcome the float valve, flood the engine and cause poor running or fuel leakage.
An electric pump should be mounted securely, wired safely and supplied through a correctly rated circuit. On a road car, consider an inertia cut-off arrangement where appropriate, particularly if the car has been modified. The aim is to stop fuel delivery after a significant impact rather than letting a damaged system continue pumping.
A pump that clicks continuously may be drawing air, facing a blockage, or simply trying to fill an empty carburettor after the car has stood. Listen to the pattern, then test methodically. Check for fuel at the tank outlet, before the pump and at the carburettor feed. This approach identifies the restricted section without guessing.
Carburettor Fuel Supply and Common Faults
On an SU carburettor, the float chamber controls the fuel level before fuel is drawn through the jet. If the float valve sticks shut, the engine may start then starve. If it sticks open, petrol can overflow, the engine may run rich, and hot starting becomes difficult. Dirt from the tank is a frequent cause, which is why the condition of the whole system matters.
A hesitation under acceleration is not automatically a carburettor problem. It could be a weak mixture setting, ignition timing, a vacuum leak or insufficient fuel supply. However, if the engine pulls cleanly at light throttle but falters after sustained higher-speed driving, inspect the filter, pump output, tank vent and fuel line routing before reaching for a needle chart.
Twin-carburettor installations add another layer. Both carburettors need balanced airflow, correct float levels and a properly adjusted linkage. One carburettor receiving less fuel than the other can mimic an ignition fault and leave the engine uneven at idle or under load.
A Safe Fault-Finding Order
Working through the system in order saves money and reduces the risk of overlooking a leak. Before testing, work in a ventilated area, keep ignition sources well away and have a suitable fire extinguisher nearby. Never inspect a suspected fuel leak with the engine running unless it is genuinely necessary and you can do so safely.
Use this order when a carburetted Mini has a fuel-related running fault:
- Check the fuel level and confirm the tank is venting correctly.
- Look for leaks, cracked hose, corrosion and loose connections from tank to carburettor.
- Inspect the filter for sediment or restricted flow.
- Test pump delivery and confirm it is the correct pressure type.
- Check float valves, float height and fuel level within the carburettor.
- Only then move on to mixture, ignition timing and carburettor adjustment.
This does not mean every rough-running Mini has a fuel problem. Ignition faults remain common, particularly with older leads, points-based distributors and poor earths. The key is to avoid adjusting the carburettor to compensate for a blocked filter or weak pump.
Choosing Parts for a Lasting Repair
A fuel-system overhaul is often best tackled as a small package of related parts. If the tank is contaminated or the rubber hose is clearly old, replacing only the failed section can leave the next weak point waiting to spoil a journey. Tank fittings, sender seals, correct-grade hose, clips, filters and pump gaskets are inexpensive compared with the inconvenience of tracing another fuel smell a fortnight later.
Fitment accuracy is especially valuable on Minis because there are so many model-year differences and so many cars have been modified over decades. Bull Motif Mini Spares can help owners source the correct system-specific parts, whether the job is a routine hose refresh, a tank replacement or a more involved carburettor fuel-feed rebuild.
Once the repair is complete, run the engine, inspect every joint carefully and recheck after a short drive. A dry system, clean fuel delivery and a correctly matched pump will not make every Classic Mini fault disappear, but they give the engine the reliable supply it needs to do its job properly.